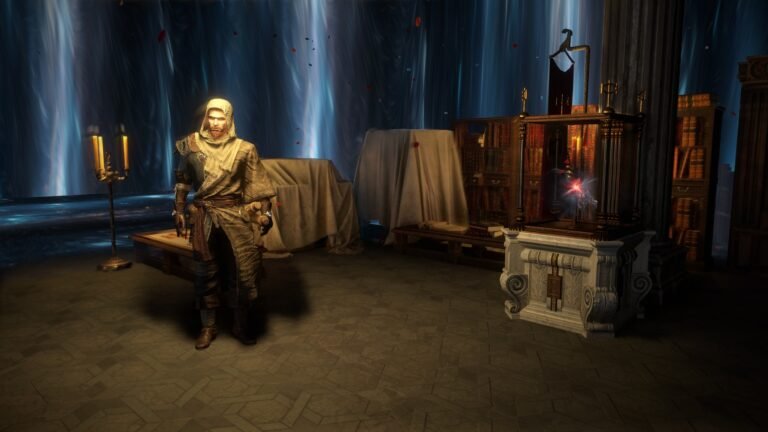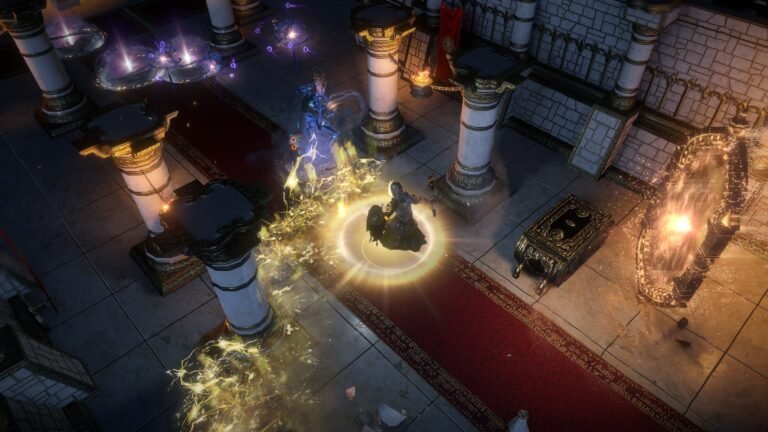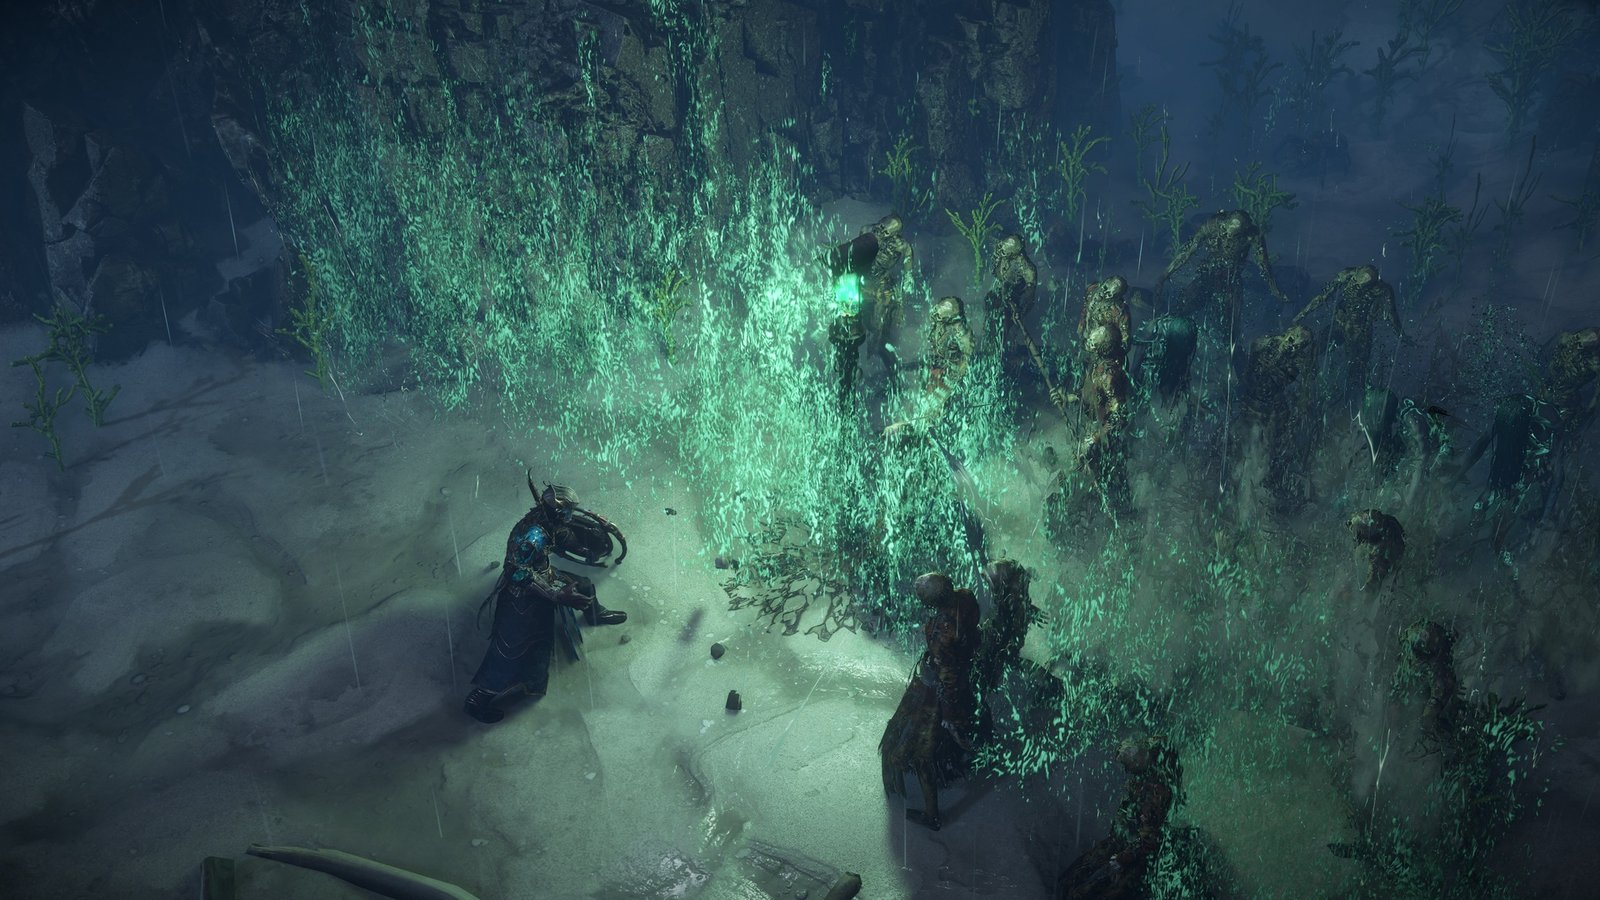
PoE 1 — Allflame (2026): exploração submarina. Divulgação: Grinding Gear Games.
Two players need boots with life, movement speed, and resistances. In a Trade League, one searches for a listing and buys them. In Solo Self-Found, the other must use a drop, finish a pair at the Crafting Bench, or obtain a suitable base and the materials to craft it. The problem is similar; the path to solving it is different.
In SSF, a mechanic with little market value can be important because it provides exactly the missing resource. The Atlas becomes a way of addressing those needs. There is no automatic drop bonus to compensate: you must choose a viable build, identify bottlenecks, and turn your own resources into progression.
This guide follows that process from character creation to endgame bosses. It covers Path of Exile 1, version 3.29 — Curse of the Allflame, incorporating the Atlas overhaul introduced in 3.28. At the editorial check on October 24, 2026, the official patch history still listed 3.29.3b as its latest update, with no newer hotfix identified. PoE 2 rules and Ruthless-specific changes are not substitutes for the regular SSF rules described here.
Nesta matéria
What Is Solo Self-Found and What Are Its Restrictions?
Solo Self-Found is an official mode that prevents trading and conventional parties with other players. It is more than a promise to play alone in a trade league: your character belongs to a separate environment with its own rankings and progression. You cannot accept gear from friends or hire another player to defeat a boss for you.
The restrictions include direct trades, the player-to-player Currency Exchange, asynchronous trading through Merchant’s Tabs, and Guild Stash sharing. You also cannot import items from an incompatible league. NPC vendors, quest rewards, Vendor Recipes, the Crafting Bench, and league-specific methods of obtaining items remain available. Buying a gem from an NPC does not break the rules.
Regular SSF offers no general increase to item quantity or rarity in exchange for the lack of trading. A hard-to-find Unique remains hard to find. The mode can appeal to players who want to learn crafting, adapt builds, and plan resource acquisition; it is not a morally superior way to play. Trade offers legitimate alternatives.
| Mode | What Makes It Different |
|---|---|
| Trade League | Trading and parties are allowed under that league’s rules |
| SSF | Conventional trading and parties between players are blocked |
| Hardcore | Death has special consequences; verify the destination in the current league |
| Ruthless | Resources and progression follow a separate ruleset, including scarcer acquisition |
| Hardcore SSF | Combines SSF restrictions with Hardcore rules |
| Ruthless SSF | Combines both sets of rules; outside the scope of this guide |
Hardcore, SSF, and Ruthless are not synonyms. In Curse of the Allflame, for example, GGG designated the corresponding non-Hardcore league as the destination upon Hardcore death. Do not assume every league handles that destination or feature availability identically.
How to Start, Share Your Stash, and Migrate
Create Your Character in the Correct Mode
When creating a PoE 1 character, select your desired league and enable Solo Self-Found. Check whether Hardcore or Ruthless is selected, choose your class and name, and confirm. Back at character selection—or after entering the game—verify the full mode label. The placement and translated names of controls can vary by version and platform.
Read the full league designation, not merely the season’s name. Voluntarily declining to trade in Trade does not make a character officially SSF, and a Trade character cannot normally migrate into SSF. If you want the official SSF classification, start there.
The Stash Is Shared Within the Same SSF League
Eligible characters on the same account within the same SSF environment share a Stash. If your first character finds a weapon for a different archetype, you can store it for a second character in that league. The second character still needs the right level and attributes, but does not necessarily begin with an empty shared stash.
Do not assume this sharing works across SSF and Trade, different challenge leagues, temporary SSF and SSF Standard, or incompatible Hardcore/Softcore environments. The exact league determines which assets you can access. Sharing items with your own characters does not permit receiving them from another player.
Migrate and Migrate All Have Different Scopes
You can leave SSF for its corresponding non-SSF league. Migrate moves the selected character and the assets covered by that individual operation; it does not automatically move the entire Stash or all shared progression. Migrate All is the broader option for eligible characters and league progress, including the relevant storage and unlocks.
Before confirming either option, identify the source and destination, read the scope displayed in the interface, and check the character, Stash, and shared progress separately. Do not select the individual option assuming it will transfer everything. GGG’s original SSF documentation explicitly distinguishes these transfers.
Treat departure as one-way for that character’s SSF status. You can create other SSF characters, but items transferred to Trade cannot simply be brought back. If better equipment or a defensive adjustment could solve your problem, consider it before migrating out impulsively.
Choose a Build That Can Progress With Your Own Resources
Ask one question first: Will this build still work if its desired Unique never drops? An optional Unique improves an already functioning character. A mandatory Unique enables an interaction without which the build does not work. In the latter case, you need an interim plan—not just hope that the item appears during the campaign.
Compare two hypothetical builds. Build A requires a rare Unique to activate its main mechanic; B works with ordinary Rares and adds Uniques as upgrades. If their gems, defenses, and other requirements are suitable, B offers a more predictable starting route. That does not prove B has the highest endgame ceiling; it means it relies less on obtaining one specific item.
Look for step-by-step progression, accessible gems, alternative bases, coherent defenses, and upgrades available through basic crafting. Some spells, minions, damage-over-time skills, and totems scale significantly with gem level, potentially reducing dependence on an exceptional weapon. Not every build in those categories is automatically SSF-friendly.
Attacks can work as well. If your skill depends heavily on local weapon damage, plan weapon replacements and identify the bases, Essences, or current recipes that can help. Do not judge a spell solely by weapon pDPS: gem levels, Spell Damage, Cast Speed, and compatible modifiers may matter more. See our first build and league starter guide for how to identify these dependencies.
Use an updated Path of Building Community to examine the starting setup, not only perfect endgame equipment. Load the build, verify its game version, inspect gems, links, passives, attributes, defenses, and required items. Duplicate the setup and replace exceptional pieces with plausible Rares you could actually find. Check whether the skill still works, the requirements are met, and the transition to endgame makes sense.
Keep the enemy and configuration conditions comparable. Flasks, charges, and on-kill buffs should not be assumed active against an isolated boss. PoB can reveal a bottleneck but cannot guarantee a drop or gameplay outcome. Use the official PoB Community releases to avoid versions with outdated rules.
Campaign: Gems, Gear, and the Crafting Bench
Acts 1–10 follow the main objectives of the corresponding league. The SSF challenge is to support your build using what you find. Keep your main skill, compatible supports, links, attributes, resistances, life or an equivalent defense, and usable flasks up to date. Claim quest rewards and check vendors when a basic item is blocking progression.
Gems come from quests, NPCs, drops, and specialized sources; not every gem is available from every vendor at every stage. A Transfigured version may depend on the Labyrinth’s Divine Font. If your build requires one, plan access and a functional alternative until you obtain it, allowing for repeated attempts. Exceptional Support Gems have their own endgame acquisition routes following the changes that began in 3.28; they are not ordinary campaign components.
In 3.29, the Crafting Bench is available in towns from Act 2 onward, as well as in the hideout. This helps fix life, resistances, attributes, or an eligible offensive modifier. It does not mean every recipe is automatically unlocked: some must still be found, and operations have costs and restrictions.
To fix a resistance:
- Open your character sheet and identify the deficient resistance after current penalties.
- Examine your gear and use advanced descriptions to identify prefixes and suffixes.
- Pick an item with a suitable available affix and compatibility.
- Open the bench, find an unlocked recipe, and check its effect, cost, and eligibility.
- Apply it only if you accept the change, then confirm the result on your character sheet.
After the two Kitava fights in Acts 5 and 10, the standard penalties add up to −60 percentage points to resistances. A hypothetical character with 75% fire, 49% cold, and 58% lightning after Act 10 is below the usual 75% elemental cap in cold and lightning. A craft on a ring or gloves might help; check life and attributes before replacing the piece.
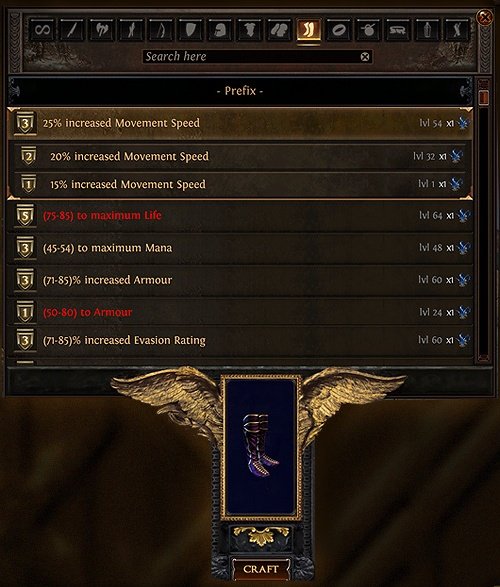
The bench screenshot is historical, from version 3.5 (2018). It helps identify equipment, categories, and recipes; verify the values and costs in the 3.29 interface before spending.
For weapons, identify what your skill scales with. Attacks may require a suitable base, physical or elemental damage, speed, and accuracy; spells may use very different modifiers. Select an appropriate base, check item level and affixes, and compare the result with your current weapon. No single recipe upgrades every archetype.
Sockets and Links in 3.29
Gems can fit into equipment sockets of any color. White is the default generated socket color, while red, green, and blue still exist. A gem in a socket matching its RGB color receives +10% quality. Matching colors are no longer a general requirement for equipping a gem, though the quality bonus can matter depending on the gem’s quality effect.
Links are still needed to connect eligible conventional skills and supports. You must still manage socket counts, links, and attribute requirements. Jeweller’s Orbs, Orbs of Fusing, the bench, and found equipment are resources for this planning. Do not chase the old mandatory color combination if your actual bottleneck is missing links or attributes.
After the campaign, check quest passives, Ascendancy, flasks, and defenses before moving on. Our first steps after the campaign covers that transition; here the priority is entering maps with a working build and enough resources to continue without buying from players.
Start the Atlas and Sustain Your Maps

Since the 3.28 — Mirage overhaul, regular Map Items are generic by tier. Rather than finding only a specific Tier 10 Mesa Map, you find a Tier 10 Map Item and choose an eligible location on the Atlas. Progression starts in the center, with four quadrants and associated Voidstone slots. Favoured Maps were removed, while the former Tier 17 maps became Nightmare Maps.
Owning a Map Item does not unlock any location you choose. Access and tier requirements still apply, and special areas may require their own item or fragments. To run Mesa with a Tier 10 Map Item, first verify that Mesa is accessible and the item meets the displayed requirements. Flexible map items do not mean unrestricted access.
Open the Atlas and Map Device, choose an accessible location, and insert a suitable Map Item. Read its modifiers before activating it, enter the portals, complete the encounter, and defeat the boss. Then check both map completion and its Bonus Objective. Collect Map Items and advance through available connections, prioritizing missing bonuses. Our Atlas and map progression guide explains the interface and exceptions.
Standard bonus requirements are Magic or higher for base-tier 1–5 locations; Rare for 6–10; and Rare plus Corrupted for 11–16. Use the location’s base tier: raising it with a Voidstone does not automatically change its bonus requirements to those of a red-tier map. Check the Atlas information. Every four completed Bonus Objectives also award +1% Map Item Quantity under the official redesign.
Map sustain means maintaining enough Map Items to keep playing. Bonuses, passives, tiers, map item quantity, and rewards help but do not guarantee every run returns another map of equal or higher tier. Track stocks by tier and purpose instead of burning the last high-tier items on attempts without a clear goal.
If inventory runs low, pursue accessible missing bonuses, run sustainable tiers, review relevant Atlas passives, and inspect Kirac or other map rewards. Extra map danger is useful only if you can complete it; losing attempts can worsen the shortage.
Kirac Still Helps, but His Old Missions Do Not
Update 3.28 removed regular Kirac Missions and their related passives. Scouting Reports are no longer acquired, and old copies do not work. Do not follow an SSF strategy that relies on farming those missions to advance.
Kirac’s current shop offers more map-related resources and can be refreshed using Gold. Regular maps generally cost Gold; special items may require other currencies. Check his available tiers, items, and prices against your next goal before buying or refreshing.
Gold remains useful in SSF because blocking player-to-player Currency Exchange does not disable NPC services. Keep some when you need Kirac to supply a missing tier. Refreshing provides another offer, not a guarantee of the exact item you want. See the 3.28 patch notes for the changes.
Direct Your Atlas Passive Tree Toward Missing Resources
In SSF, your next upgrade can begin with a choice of content. A strategy yielding expensive trade materials may be unhelpful if you cannot sell them to buy boots. A mechanic supplying the Essences you need may have more direct value. Allocate points based on your actual shortage.
| Current Objective | What to Prioritize |
|---|---|
| Unlock and sustain maps | Bonus Objectives, relevant passives, and map stock by tier |
| Improve ordinary Rares | Essences, Harvest, or Expedition depending on your project |
| Use Fossils | Sulphite and access to Delve |
| Obtain Stygian Vise or Abyssal Jewel | Abyss and its current rewards |
| Obtain Catalysts | Ultimatum, with a build capable of completing it |
| Target a specific Unique | Its real drop source, boss, or eligible Divination Card |
| Prepare for a boss | Progression and access materials for that encounter |
These are goals, not a universal tree. Consider available points, travel paths, difficulty, and respec cost. Group compatible needs rather than rebuilding the tree for every item. Once you have sufficient materials, shift priorities instead of farming a mechanic solely because you previously invested in it.
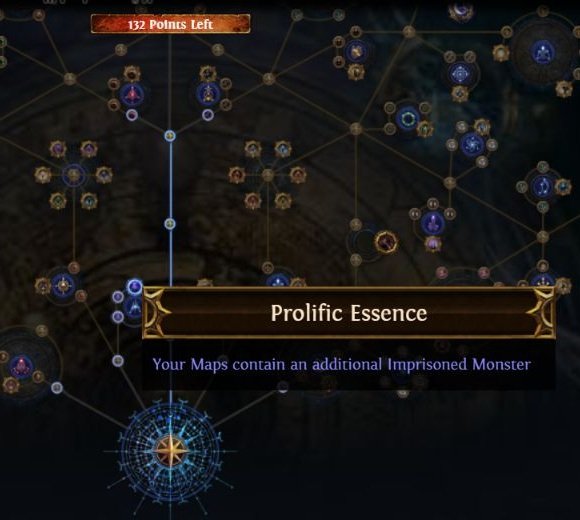
The screenshot shows a six-point example combining map passives and Prolific Essence in GGG’s official viewer. It is not a universal SSF tree. Check the wording of nodes, available points, and the resources your build needs.
Also distinguish between increasing a mechanic’s frequency, improving its rewards, and securing a specific item. An Abyss-focused tree creates chances to obtain a belt; it does not guarantee one in every map.
Where to Find Materials and Equipment in SSF
This reference table connects mechanics with their uses. You do not need to run all of them at once: prioritize content appropriate to your current stage and build.
| Mechanic | Resources and Opportunities | Planning Use |
|---|---|---|
| Essence | Guaranteed modifiers depending on currency, tier, and item class | Start a Rare with a required affix |
| Harvest | Lifeforce and Horticrafting Station operations | Compatible reforges and adjustments |
| Delve | Fossils, Resonators, and mine rewards | Crafting using those materials |
| Expedition | Rog, Tujen, Gwennen, and Dannig | NPC gear, crafting operations, and resources |
| Betrayal | Safehouses, Veiled Items, and special rewards | Current Syndicate reward projects |
| Bestiary | Beastcrafting in the Menagerie | Specific recipes and limitations |
| Breach | Genesis Tree and its rewards | Eligible gear and bases |
| Abyss | Stygian Vises and Abyssal Jewels | Abyssal socket belt and build jewels |
| Ultimatum | Catalysts | Quality for compatible jewelry modifiers |
| Heist | Contracts, Blueprints, currencies, Experimented Bases | Specific resources and bases |
| Ritual | Rewards currently offered | Useful items and materials when presented |
| Legion | Special rewards, splinters, and related access | Mechanic-specific goals, without assuming a particular drop |
Essences and Harvest: Turn Materials Into a Useful Item
To use an Essence, select a base and check item level, class, rarity, and the effect written on the currency. A compatible Essence of Greed can guarantee maximum life on boots, but not movement speed, two resistances, and attributes as well. Apply it, inspect the other generated affixes, and check whether a bench recipe can complete the item.
The following screenshot was taken from a Craft of Exile lookup for Boots (DEX). The Essence group shows life tiers associated with Greed. It is a tool data table, not an item crafted by ZAUS.GG or proof of a drop. The Essence determines the guaranteed affix; item level remains relevant for other eligible affixes.

Decide what is good enough before crafting. If the resulting boots already fix life and resistance without breaking the build, rolling again may waste resources needed for the next piece. Keep the equipped item while working on a second base if losing your current result would stop you from playing. The beginner crafting guide develops this approach without requiring metacrafting.
In Harvest, complete encounters, collect Lifeforce, and review the available operation at the Horticrafting Station. Check which properties may change or remain, eligibility, and cost; proceed only if you accept the outcomes. Targeting a modifier category does not mean choosing an entire affix combination freely.
3.29 removed Harvest Synthesis. Do not plan to create Synthesised Rares using the old recipe. Non-Unique Synthesised items ceased being normally obtainable, with the officially noted exception of corrupting a Synthesised Unique into a Rare. That does not restore the former process for arbitrary bases.
Delve and Expedition: Plan Acquisition Before Spending
Update 3.28 removed Fossil sources outside Delve, making the Azurite Mine the route for those materials. Identify the Fossil you need, acquire Voltaxic Sulphite, explore the mine, and look for appropriate rewards, including side paths and fractured walls where relevant. Gather compatible Resonators for the chosen base. Fossils change affix possibilities; they do not guarantee a perfect item.
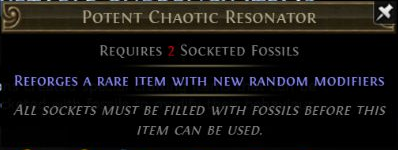
This historical official tooltip shows a Resonator with two Fossil slots. It helps identify the component; verify current base restrictions before combining materials, especially when dealing with Fractured Fossils.
Do not confuse Voltaxic Sulphite used in Delve with Dead Man’s Sulphur from Allflame. Their similar names do not mean the resources are interchangeable.
In Expedition, read Remnants before detonating: their restrictions can make an encounter impossible for your build. Then use the acquired materials with the corresponding NPCs. Rog offers gear and crafting operations; inspect the base, item level, affixes, proposed change, and price. He does not let you freely select every modifier.
Tujen bargains for resources; Gwennen has her own equipment-offer system; Dannig manages the mechanic’s other exchanges. These are NPC interactions, not trades with players. However, Tujen no longer offers Catalysts in 3.29: that historical farming route is outdated.
Sources That Require Version Awareness
In 3.29, Abyss is the normal exclusive source for Stygian Vises and Abyssal Jewels. The announced exception is a rare chance to obtain Abyssal Jewels in Delve’s Abyss Biomes; do not extend that exception automatically to belts. To obtain a Stygian Vise, run Abyss and inspect the base and affixes. The socket also needs a useful jewel; no individual encounter guarantees both.
Ultimatum is now the normal exclusive source of Catalysts. Older sources, including Tujen’s offers and certain Expedition or Ritual rewards, were removed. Choose the Catalyst appropriate for your jewelry’s modifiers and make sure the build can handle the encounter before prioritizing it. Quality on a temporary item may matter less than fixing a resistance.
Betrayal still provides Safehouses, Veiled Items, and specialized rewards, but don’t rely on unlocking every bench recipe through Unveiling: since 3.26, those recipes have been moved to recipe objects in maps. Bestiary has changed too: previous Split operations were replaced in 3.29 by specific recipes that fracture modifiers on Rare Talismans, subject to affix-count requirements. They are not universal fracture crafts for any item.
Breach’s Genesis Tree received reductions to inherent Modifier Tier Rating bonuses and the likelihood of generating additional gear. Don’t treat 3.28 results as a promise of current yields. In Heist, check the Contract/Blueprint reward category before targeting Experimented Bases. In Ritual, evaluate actual offers rather than expecting a Unique after a fixed number of encounters. See the official 3.29 patch notes.
Target Uniques and Plan Crafting Without Assuming Perfect Luck
Before committing sessions to a Unique, investigate its current source. Is it in the global drop pool, boss-restricted, mechanic-specific, or tied to another limited reward? Does it have a Divination Card? Can your build do that content without already owning the item? The last question tells you when a temporary setup or second character is necessary.
Use updated PoEDB information and community documentation to check acquisition. Don’t assume a boss-restricted Unique drops in normal maps. Targeting a source improves the relevance of attempts but does not guarantee the item. Keep a functioning alternative while farming it.
For Divination Cards, verify the exact reward and required stack size, their current sources, and which locations exist in 3.29. Then plan the Atlas and track cards found. Some rewards are random or conditional, and not every Unique has a dedicated card. Generic Map Items make eligible locations easier to select but do not restore deleted maps or old drop tables.
The same principle applies to crafting: define the problem and minimum acceptable outcome first. Find an appropriate base and item level, inspect prefix/suffix pools and modifier groups, select the method, and budget replenishable materials. Compare the result with your equipped item, including life, resistances, attributes, and links. Stop when the item is good enough rather than consuming all supplies chasing a marginal affix.
A Fractured base preserves its fractured modifier in compatible operations, but is worth investing in only when the base, affix, tier, and item level suit the project. Fracturing Orbs and Fractured Fossils follow different rules. In 3.29, Fractured Fossils fracture one random modifier and cannot be used on already Fractured or Influenced items. Do not confuse them with their historical copying behavior. Use Craft of Exile to evaluate compatibility and estimates without mistaking them for guarantees.
For currencies, direct utility outweighs market exchange rates. A simple Essence may fix your boots now; a Divine could matter for a future metacraft. Save hard-to-replace materials when you have a concrete project or the current item is temporary, but spend them when an eligible operation removes a bottleneck. Hoarding indefinitely has a cost too: the character remains stuck while the solution sits in your Stash.
Adjust Your Loot Filter and Organize Your Stash
A Loot Filter changes how dropped items are displayed; it does not increase quantity, rarity, or your odds of finding a Unique. A filter designed only around trade prices may hide the exact crafting bases and materials you need. Its priorities should evolve with your build rather than simply using the most restrictive preset.
On FilterBlade, select PoE 1 and check the filter version. Start with a preset, identify relevant bases, item levels, links, and materials, and customize the needed categories. Export it locally or use the supported synchronization workflow, select the filter in-game, and verify that critical items remain visible. Review it after your progression changes: what mattered during the campaign may no longer deserve emphasis in maps.

Avoid hiding basic currencies, Essences, Fossils, jewels, fragments, and Map Items prematurely. Test your changes in the simulator when available, and check their behavior in-game. You don’t have to show every Rare forever, but hiding your next crafting base prevents you from recognizing it when it drops.
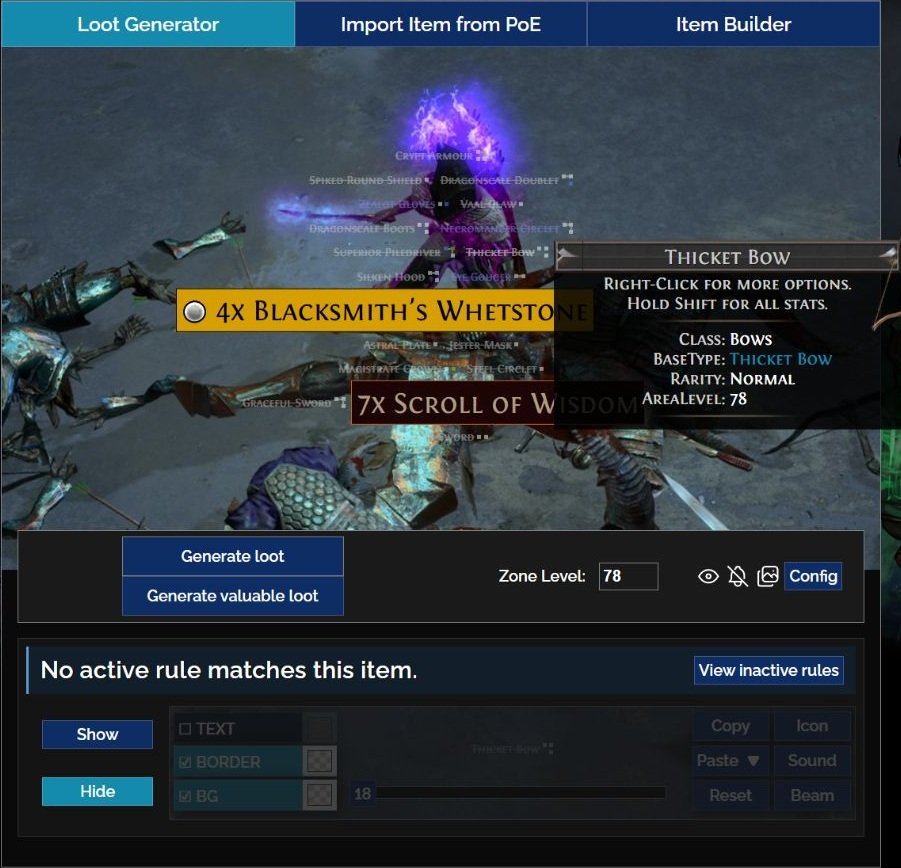
The simulator example shows a Thicket Bow hidden, with no matching active rule reported. Before exporting, generate or inspect examples of the bases and materials your project needs and review rules that hide them. This tests filter presentation; it is not evidence of actual drop distribution in a play session.
Organize storage by purpose and project. Specialized tabs help, but manual organization can separate resources without requiring extra purchases just to start SSF.
| Group | Organizing Principle |
|---|---|
| Currencies and Essences | Separate progression materials from those reserved for projects |
| Fossils and Resonators | Keep planned operation components together |
| Map Items | Track stock by tier and special access resources |
| Fragments and invitations | Group by the boss or mechanic they unlock |
| Gems and Jewels | Keep useful variants for current or planned characters |
| Bases and Uniques | Keep relevant, hard-to-replace properties with a concrete use |
Before storing an item, ask whether it serves your current build, a planned character, or a specific craft. One valuable rare affix can justify space; six unsuitable affixes do not make a Rare valuable to you. Compare with what you already own. Organization is about finding and using your resources, not collecting every drop.
Prepare for the Current Bosses and Voidstones
In SSF, you must obtain access materials and complete encounters without buying fragments or recruiting other players. Pick one goal at a time; track the Atlas quest chain, identify required invitations or fragments, and plan how to replace them before spending an important attempt.
Version 3.28 reorganized the four Voidstones. They no longer follow the old list of four separate bosses each dropping one stone:
| Voidstone | Acquisition Objective | Planning Caveat |
|---|---|---|
| Ceremonial | Defeat Maven | Advance through the necessary progression and encounter access |
| Decayed | Defeat Shaper and Elder; Uber Elder remains eligible | A single victory is not the full Shaper/Elder objective |
| Eldritch | Defeat Searing Exarch and Eater of Worlds | Requires both objectives, not one separate stone for each boss |
| Originator | Defeat Incarnation of Dread | Complete the required progression and access chain |
Each Voidstone affects the quadrant it is placed in and provides its own global benefits. The overhaul raises the minimum tier of locations in that quadrant to 16, improves the tier of Map Items found there, and converts tier 15 or lower items into Gold under the system’s rules. Voidstones also contribute to the possibility of obtaining Nightmare Maps. Read the actual item: the four are not identical Atlas-wide tier boosts.
For Maven, follow Witnesses and required encounters; Invitations are accessed through Kirac rather than the old method of placing certain quest items into the Map Device. For the other routes, obtain each chain’s proper access materials. A generic Map Item does not replace special-area access.
Before an attempt, check sustainable single-target damage, resistances, life/ES, mitigation, recovery, Mana, movement, and flasks. Buffs driven by kills may be absent against a boss with no adds. Learn key mechanics and consider the cost of failure, without waiting for perfect gear before attempting every challenge. Defeat can reveal the next adjustment but may require farming the entrance again.
Defeating a boss does not necessarily drop your desired Unique. Keep progression objectives, such as claiming a Voidstone, separate from repeating a boss for a random reward. One set of fragments does not equal the item needed by your next build.
Allflame, Mercenaries, and a Second Character
Curse of the Allflame is the seasonal content of 3.29; don’t assume its mechanics remain afterward. You find Charts, board The Sovereign, and explore underwater locations protected by Allflame Lanterns. Charted areas can be arranged into Voyages to plan modifiers and rewards. Ducats and other special resources provide additional ways to obtain or modify items.

In SSF, value those rewards by how they can help the build. A Chart supplying a missing material may be more useful than one chosen only for trade value. Consider whether you can complete the encounter, its hazards, and the time you can safely commit; it is not an unlimited resource source.
With Vesper’s Allflame Crafting, review the operation, item, eligible currency, Dead Man’s Sulphur cost, and Intangibility before proceeding. It can offer Ghostly Copies, alternative outcomes from which you choose the eligible one to keep. Don’t assume a fixed number of copies: Intangibility affects the possibility of generating several alternatives in future operations.
Compare outcomes against the whole build, not the biggest single affix. The choices may be poor, and a temporary item may not justify the expense. Allflame is one possible route—not mandatory for starting maps and not a guarantee of perfect equipment. The official expansion page describes exploration and crafting.
Mercenaries of Trarthus became core content in 3.29. Their encounters, duels, and eligible NPC allies are compatible with SSF and do not count as parties with other players. GGG stated that a mercenary is not counted as a party member for monster life or party quantity/rarity bonuses. Do not expect increased drops merely because you brought one.
Temporary mercenaries and the Luminary’s permanent hiring follow their own restrictions; not every class can retain every mercenary forever. Use the eligible features without confusing NPC assistance with accepting items or help from other players.
A second character makes sense when you find an enabling Unique, want a specialized bossing/farming character, or want to change playstyle with enough resources already saved. Store the gear in the Stash of that same SSF league; plan gems, attributes, and progression before beginning. But a temporary resistance shortage does not require abandoning your build. Compare the cost of fixing it in PoB with rerolling. Shared storage adds options without making every new build instantly ready.
Five Practical Decisions and a Progression Checklist
These are hypothetical examples—not claims that ZAUS.GG performed SSF gameplay or testing.
| Situation | Practical Decision | What to Avoid |
|---|---|---|
| Build A requires a rare Unique; B works with Rares and gradual upgrades | If otherwise suitable, start with B and retain a viable path | Choosing only by perfect endgame DPS |
| After Act 10: fire 75%, cold 49%, lightning 58% | Check affix space, Bench, and a compatible Essence to fix weaknesses | Prioritizing damage while the main vulnerability remains |
| Running short of a required Map Item tier | Check supply, reachable bonuses, passives, and Kirac’s shop; run sustainable tiers | Farming removed Kirac Missions or Scouting Reports |
| Need a Stygian Vise | Prioritize current source, Abyss; evaluate base, affixes, and an appropriate jewel | Assuming a guaranteed drop or obsolete belt source |
| Need Catalysts | Identify type and prepare for Ultimatum | Following the historical Tujen route |
Before proceeding, use this checklist:
- Correct SSF league selected; restrictions, sharing, and migration understood.
- Starting build functions without a mandatory rare drop; gems, requirements, and transitions planned.
- PoE 1 Loot Filter current, with required bases and materials visible.
- After the campaign: resistances, life/ES, recovery, gems, links, flasks, and Ascendancy reviewed.
- Atlas started with compatible Map Items; bonuses and supply tracked, with the current Kirac shop as an option.
- Next upgrade identified and its resource source located.
- Base, item level, affixes, recipes, costs, and minimum acceptable craft outcome checked.
- Difficult-to-replace materials reserved for concrete projects; attempt limits set.
- Next boss’s access known, build prepared, and risks understood.
- After each upgrade, verify the result and reassess the next priority.
SSF progression is about assigning a purpose to what you find. Identify the need, find the source, prepare the content, obtain the resource, and use it to improve the build; then reassess. One simple Essence, a useful base, or a bench adjustment may unlock your next goal without perfect equipment.
Editorial sources checked October 28, 2026: official 3.28 notes, 3.29 notes, 3.29.3b notes, and the patch history. Official GGG material: Allflame; historical assets are identified. The Atlas tree image is a ZAUS.GG screenshot of GGG’s official viewer. Other tool screenshots: ZAUS.GG; interfaces from FilterBlade / NeverSink and Craft of Exile, incorporating GGG game elements. These are not ZAUS.GG SSF sessions or original crafting results, and third-party media should not be presumed openly licensed.
About the Author