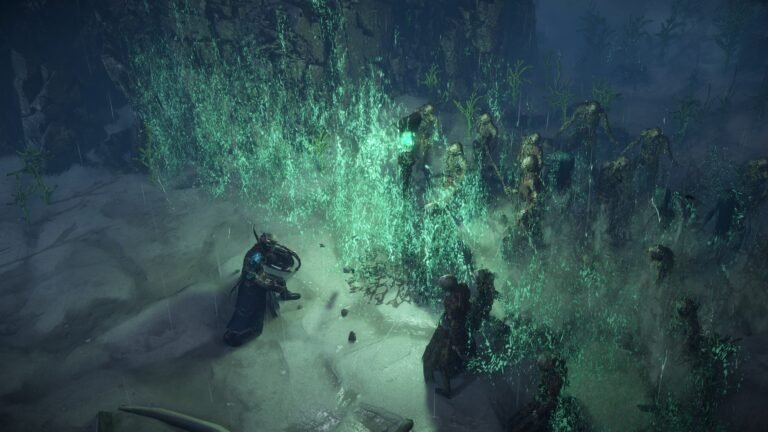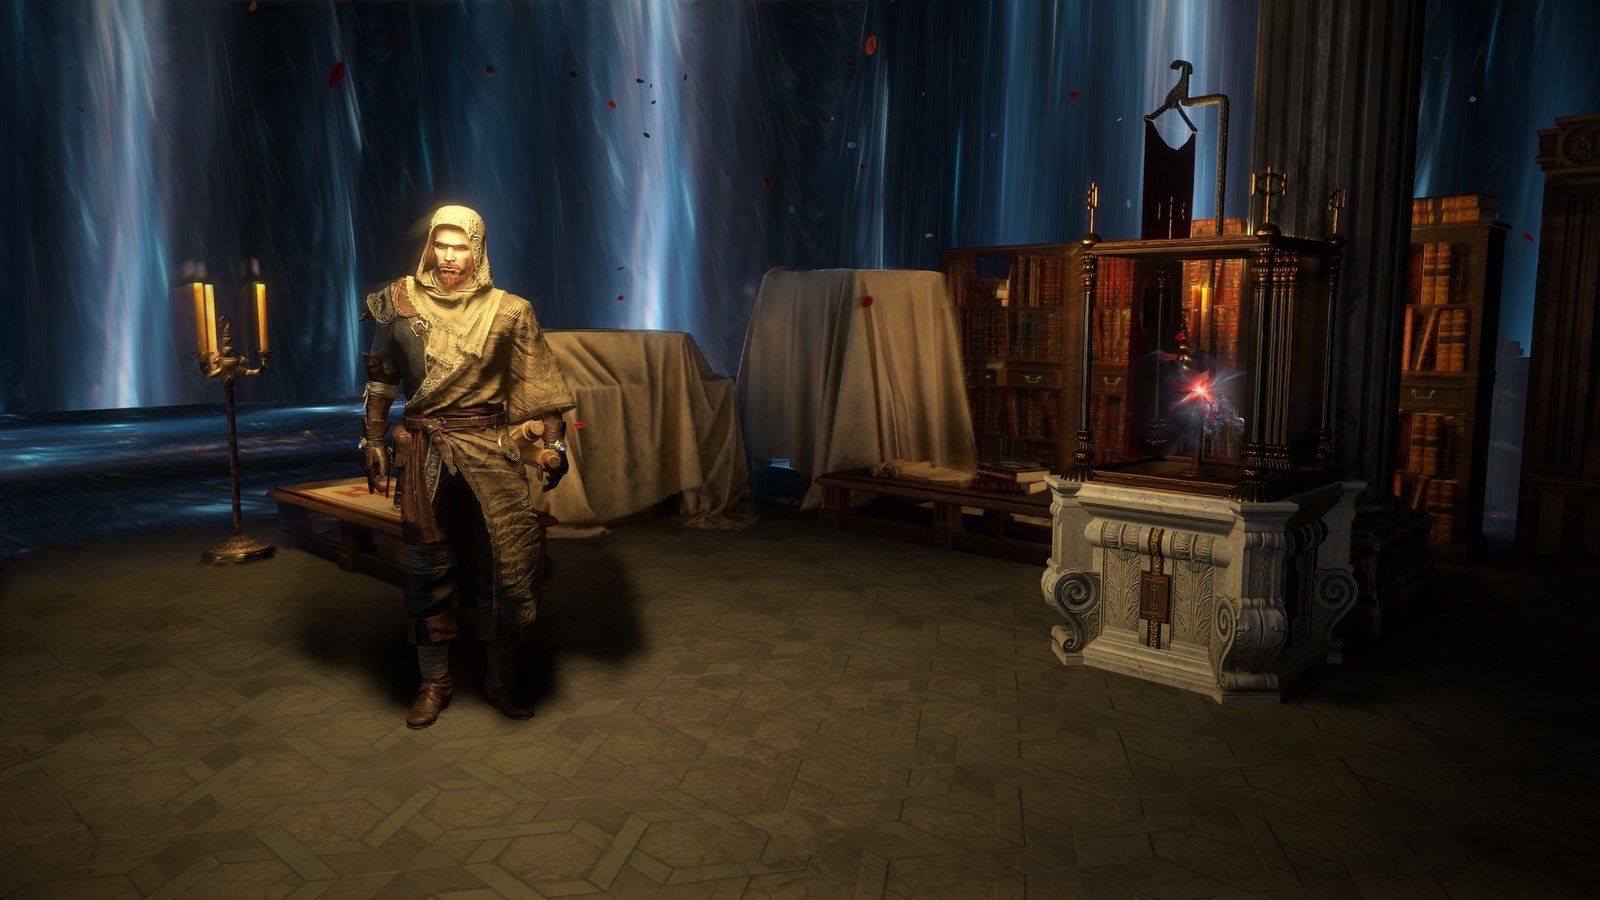
PoE 1 — Mirage (2026): Eagon numa Memory Vault. Divulgação: Grinding Gear Games.
You copy a farming strategy advertised as generating many Divine Orbs per hour, prepare maps, and buy Scarabs. Your build takes too long to finish encounters, some attempts fail, and your Stash fills up with equipment. A tool assigns a high value to your inventory, but those items haven’t sold yet. Is the farm actually profitable, or are you just accumulating rewards?
The answer depends on costs, completed sales, unsold inventory, and time, as well as your character’s capabilities. This guide teaches you to choose, run, measure, and compare activities in Path of Exile 1, using the rules of 3.29 — Curse of the Allflame and the Atlas overhaul introduced in 3.28. All economic examples are hypothetical, not current market quotes or ZAUS.GG gameplay test results.
At the editorial check on October 28, 2026, the latest numbered update in the official patch index was 3.29.3b. The method remains useful across leagues, but prices, access requirements, rewards, and consumable effects must be checked again when they change.
Nesta matéria
Choose a Farm Based on Your Goal and Build’s Capabilities
Farming means deliberately repeating activities to obtain resources, gear, experience, or progression. It can take place in maps, boss encounters, separate content, or crafting processes. Earning Divine Orbs is one possible goal, but you might also farm Essences for crafting, boss fragments, or Map Items to progress your Atlas.
Two players may run Harvest for different reasons: one sells Lifeforce in Trade, while another uses it on their own gear in SSF. The activity is similar, but the success metric changes. To explore your options without mistaking them for universally profitable recommendations, see our catalog of farming methods.
A sensible selection process is goal → build → progression → budget → strategy → test.
- Define what you want: currency for upgrades, materials, experience, boss access, or a specific item. Set an observable target.
- Evaluate area and single-target damage, defenses, movement, Mana, recovery, and comfort. A fast mapper isn’t necessarily good at a prolonged encounter without extra monsters.
- Identify the actual bottleneck: do Rares take too long, do dense packs kill you, do you lack resources to cast skills, or do certain modifiers make the content impossible?
- Check your current progress: areas, tiers, Atlas points, Voidstones, equipment, and unlocked activities. A fully developed endgame setup isn’t an immediate option after finishing the campaign.
- Assess available capital, consumables, and a reserve for poor results. Also consider the time required to sell rewards and buy the next batch.
- Pick a compatible option and document a test before investing more.
A build with excellent single-target damage but limited coverage may be slow at farming dense packs. Another clears packs quickly but cannot sustain damage against a boss. Clear speed and bossing are not mutually exclusive categories: assess how the build performs in the intended encounters. Comfort matters as well; a method that demands unsustainable concentration can be less efficient over a full session.
Our guide to the first steps after the campaign helps you organize the transition before taking on higher costs.
Separate Starting Capital, Consumables, and Preparation
Starting capital is what must be available before you begin. Operating cost is the value of the resources actually consumed. For twelve maps with three Scarabs per map, for instance, you need the Map Items and 36 Scarabs. But a weapon used across many sessions is still an asset: don’t automatically charge its full purchase price to a single batch.

The Scarab stacks in this inventory image are promotional material from 3.28. The amount stored does not establish how many you may use per area; check the current Scarab’s individual limit.
If you want to measure the return on a gear upgrade, track that investment separately or use an explicitly defined allocation method. Charging the full weapon cost to one session, then ignoring it in the strategy used for comparison without explaining why, is not a consistent method.
| Investment | Preparation and Exposure | When to Consider It |
|---|---|---|
| Low | Few consumables, simple preparation, lower financial exposure | Learning the activity, progressing, or testing with limited resources |
| Medium | Moderate consumption and greater specialization | Functional build, established access, and sustainable resupply |
| High | Potentially expensive preparation, higher requirements, and greater consequences of failure | Capital, build, and experience suited to the content |
These tiers have no fixed prices and do not guarantee profits. Investing more may improve possible rewards while making time, risk, or restocking costs worse. There is no universally correct reserve percentage: consider how many attempts you can fund, what happens if drops sell slowly, and which resources you need to keep playing.
Prepare the Location, Map Item, Atlas, and Scarabs
Since 3.28, conventional Map Items are generic by tier. Choose an eligible location on the Atlas and use an item that meets its requirements; owning a Tier 10 Map Item doesn’t unlock any arbitrary location. The Atlas starts in the center and comprises four quadrants. Favoured Maps, old Map Device Crafting options, Kirac Missions, and Scouting Reports were removed. Older routes dependent on those systems must be reconsidered.
Choose a location based on layout, monster distribution, boss, target mechanic, current Divination Card sources, and access. Open layouts may benefit some builds with wide coverage, but there is no universally best map for every method. The Atlas and map progression guide explains the structure in depth.
Before starting, confirm location and tier, Map Item rarity and modifiers, dangers to your build, the selected tree, and compatible consumables. Read Notables and Keystones in the official Atlas planner, count your points, and save the configuration. Specialize in one main mechanic; add a second only if its contribution justifies the additional time and investment.
Scarabs can add encounters, strengthen monsters, or change rewards. Check each Scarab’s current text, limit, eligibility, and compatibility in the Map Device. Don’t assume every variant can be duplicated or that its effects are unchanged from a past league. The maps, modifiers, and Scarabs guide goes through the setup.
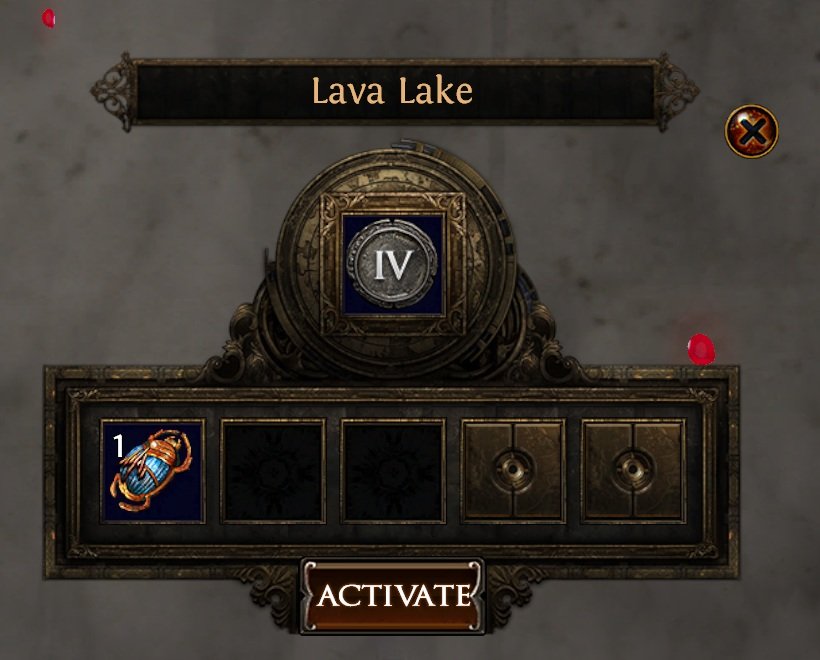
The historical screenshot separates the Map Item from Fragment slots. The locked slots belong to that demonstration: check what your character currently has available and the latest requirements before assembling a batch.
In a separate hypothetical example, Scarab A costs 2 Chaos, B costs 3, and C costs 1: 2 + 3 + 1 = 6 Chaos in Scarabs per map. You must still add the Map Item, preparation, and any other consumables. These are not the same prices used in the central twelve-map example below and are not live quotes.
A secondary mechanic can increase revenue per map while lowering results per hour if it takes too long. Modifiers that double completion time or cause failures can have the same effect. In 3.29, the historical percentage-based map reflection modifiers were replaced by Physical and Elemental Thorns on Rares, which reflect fixed damage under triggering conditions rather than a historical percentage of your hit. They are not harmless. Assess damage type, hit frequency, defenses, and recovery before keeping a dangerous map for its possible rewards.
Evaluate Complete Sequences and Content with Separate Rules
Astrolabes, Shaped Regions, and Memory Vaults
Applying an Astrolabe to an eligible location creates a Shaped Region in that quadrant, affecting several locations. When you complete the content added by the Astrolabe, its influence is removed from that location and the remaining locations gain an additional modifier. Once the region is cleared under the system’s conditions, Eagon takes you to one of four Memory Vaults.
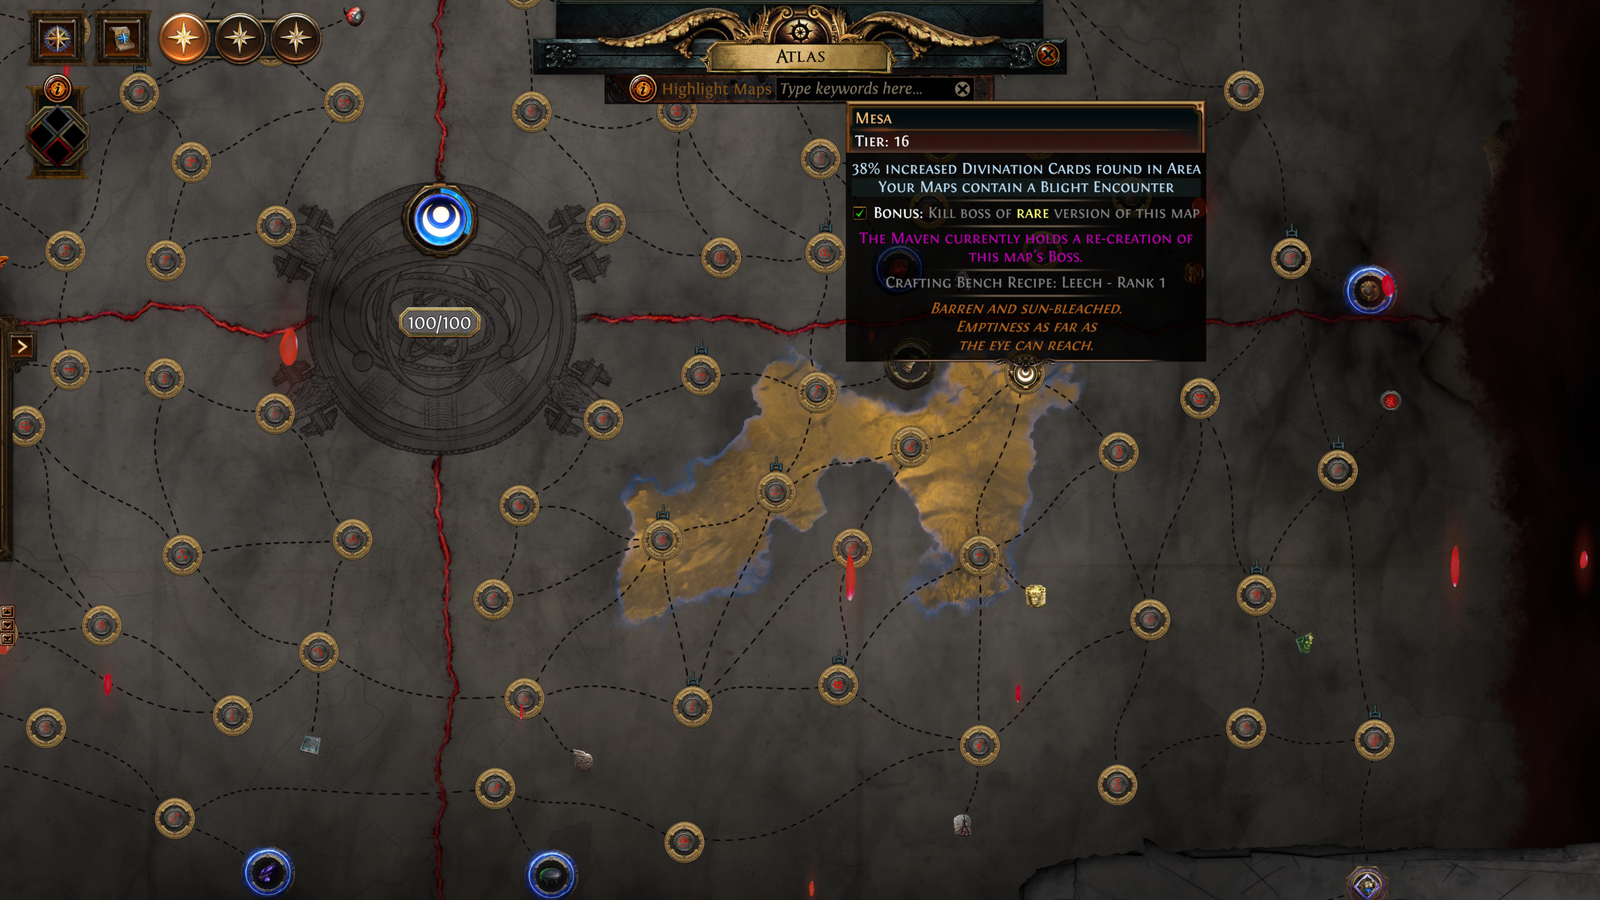
Measure the entire sequence: Astrolabe, maps, Scarabs, preparation, time, failures, intermediate rewards, and Vault. Don’t present only the final reward as though access was free. Equally, don’t assign all costs to the final map and then count the earlier expenses a second time.
Record the region and conditions used. Passives and effects that change how locations collapse may alter the route, so two sequences aren’t automatically equivalent. The basic rules appear in the official 3.28 patch notes.
Atlas Anomalies and Activities Outside Conventional Maps
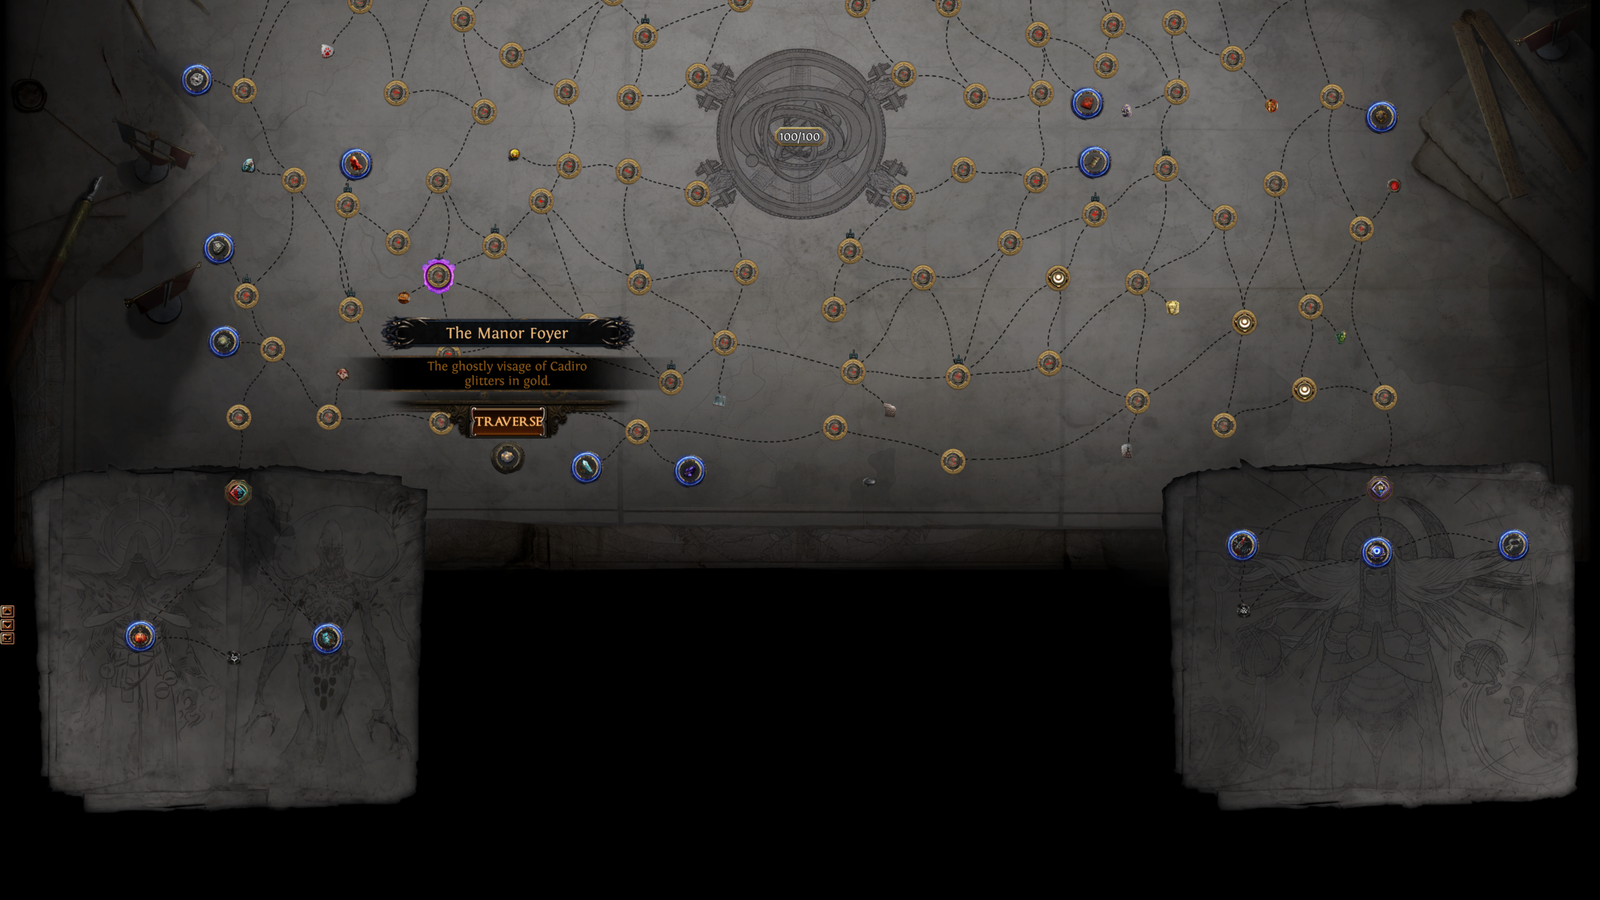
In 3.29, completing maps affected by a Voidstone can cause an Anomaly to appear when you reopen the Atlas. Reflecting Mists and the Nameless Seer now appear in separate locations within that system. These activities require no Map Item, are not affected by Atlas passive-tree modifiers, and cannot be enhanced with Fragments. Don’t purchase Scarabs for an area that doesn’t support them. Measure time, risk, and rewards without inventing a Map Item cost.
Heist, Delve, Sanctum, Expedition Logbooks, Simulacrum, and Blighted Maps each have their own access and conditions. Record the resources spent per attempt, preparation, duration, failures, and how rewards are realized. Do not automatically apply all ordinary-map costs and advantages to them.
For bossing, include fragments, Invitations, and all other access costs across every attempt, including those with disappointing drops. A rare reward can transform the batch total but does not erase earlier costs. For crafting items to sell, track bases, materials, attempts, ruined items, production time, and selling time. The cost of making an item does not determine what someone will pay for it.
Calculate Sales, Inventory, and Results Without Double Counting
Pick a reference currency such as Chaos, and record the date and exchange rate whenever you convert values. Never add Divine and Chaos without an explicit conversion rate. When rates change, label the revaluation so you can distinguish farming performance from market movements.
Realized revenue is the amount actually received from completed sales plus currency drops you’ve explicitly chosen to include as realized holdings. State the rule. Estimated inventory is the assigned value of items not yet sold. A price estimated by a tool is not a completed sale and does not guarantee the entire inventory can be sold at that price.
Use consistent definitions:
- Realized net operating result = realized revenue − operating costs included.
- Potential net result = realized revenue + estimated unsold inventory − operating costs included.
- Result per attempt = chosen result ÷ number of attempts.
- Result per hour = chosen result ÷ measured time in hours.
Specify which result appears in the numerator. Potential per hour includes amounts that are still uncertain, whereas realized per hour uses revenue already recognized under the declared rule. State whether your time denominator includes only execution or also preparation and selling work.
When selling an item previously included in estimated inventory, remove its estimate and add only the amount received. If an item valued at 30 sells for less, the projection must fall. Don’t keep the same item in both realized sales and unsold inventory. Any extra time needed to complete the sale must also be included in your chosen total-efficiency metric.
These calculations describe a batch under defined costs, not your character’s entire net worth. Gear costs, the value of self-found resources, and other economic choices should be identified and tracked separately, as in the opportunity-cost discussion below.
Worked Example: 12 Maps and Two Ways to Measure Results
Consider the fully hypothetical batch below. The prices are not league quotes, and ZAUS.GG has not measured these results in gameplay. The aim is to follow the same data from cost to hourly outcome. The 132 Chaos represents completed sales only; no directly collected currency is added to that figure.
| Batch Record | Value | How to Interpret It |
|---|---|---|
| Maps attempted | 12 | Every attempt in this example |
| Map Items and preparation | 24 Chaos | Resources consumed in the batch |
| Scarabs | 36 Chaos | Consumed across the 12 maps |
| Other consumables | 12 Chaos | Other included operating costs |
| Total operating cost | 72 Chaos | 24 + 36 + 12 |
| Completed sales | 132 Chaos | Amount received, not listed prices |
| Items not yet sold | Estimated 30 Chaos | Remaining inventory, subject to revision |
| Gross value including estimates | 162 Chaos | 132 + 30, before costs |
| Running the maps | 60 minutes | Time spent in the content |
| Preparation | 15 minutes | Work done before execution |
| Organization and sales | 15 minutes | Sorting and selling work already done |
| Total measured time | 90 minutes | 60 + 15 + 15 = 1.5 hours |
From Costs to Results per Map
Average cost: 72 ÷ 12 = 6 Chaos per map. Completed sales equal 132 Chaos; subtracting 72 consumed gives a realized net operating result of 132 − 72 = 60 Chaos. This is the realized balance under the example’s cost rules.
Adding the estimated 30 Chaos still in inventory gives 132 + 30 = 162 Chaos of gross value including estimates. After the same costs, 162 − 72 = 90 Chaos of potential net result. The 30-Chaos difference depends on future sales achieving the estimated price.
Across twelve attempts, realized result is 60 ÷ 12 = 5 Chaos per map; potential result is 90 ÷ 12 = 7.5 Chaos per map. Don’t report 7.5 as currency you’ve already received: some of it remains in items.
Include the Time You Are Measuring
90 minutes = 1.5 hours. Realized result per total hour is therefore 60 ÷ 1.5 = 40 Chaos/hour. Including the inventory estimate gives 90 ÷ 1.5 = 60 Chaos/hour of potential result per total hour, conditional on realizing the inventory.
An execution-only hourly rate excludes the 30 minutes spent preparing, organizing, and selling. It measures pace inside the content; the total-hour rate covers the batch’s complete measured work.
Hypothetical example — not a real gameplay test. Compare these two views of the exact same batch:
| Measurement Scope | Time Denominator | Realized per Hour | Potential per Hour |
|---|---|---|---|
| Execution only | 60 min = 1 h | 60 Chaos/h | 90 Chaos/h |
| Complete batch | 90 min = 1.5 h | 40 Chaos/h | 60 Chaos/h |
Don’t compare your total-time metric with an advertisement that measures only time inside content. Apply the same definition across strategies. If selling the estimated 30 Chaos requires more work, update both the amount received and that added time. The current potential result does not promise that everything can be realized without extra effort.
ROI, Opportunity Cost, and Whether Extra Scarabs Pay Off
For a simplified operational comparison, ROI = (net result ÷ operating cost) × 100%. Identify whether you’re using realized or potential results. If the cost in the denominator is zero, this calculation is undefined; don’t announce an infinite percentage as a useful comparison.
In an independent hypothetical example, an activity consumes 100 Chaos and produces 140 in completed sales. Net result is 40, so 40 ÷ 100 × 100 = 40% realized ROI. That means a return equal to 40% of the included cost, not automatically efficiency over time. An activity with high ROI can take longer and produce less per hour.
Break-even occurs when revenue covers the included costs. If cost and revenue are both 50 Chaos, 50 − 50 = 0 net operating result. The defined cost was recovered, but there was no net profit; that doesn’t mean your time had no value.
Self-Found Resources and Opportunity Cost
A Scarab found in a previous session caused no currency outlay today. Nevertheless, in Trade, using it may mean giving up the alternative of selling it. That forgone alternative is an opportunity cost, not an actual Chaos payment.
Maintain two records if necessary: what you really paid and the estimated economic value of consumed resources. To compare a purchased Scarab with an identical one you found, an economic comparison might value them equally even while cash outflows differ. Don’t add the purchase price and full opportunity value of the same Scarab as though they were two separate consumptions.
Time also carries an opportunity cost: choosing one activity may prevent you from running another viable method. Compare risk, capital, concentration, and comfort before calling the difference between advertised returns a guaranteed loss. A method your build cannot actually run isn’t a practical equivalent alternative.
An Extra Scarab Must Cover Its Added Cost
Make an incremental comparison: compared with the version without the Scarab, how much additional reward, cost, and time does it produce? All numbers here are hypothetical, not observed prices or drop rates.
If a Scarab costs 5 Chaos and adds an estimated 10 Chaos in rewards, that is 10 − 5 = 5 Chaos of incremental value before added time and other expenses. If it costs 20 Chaos but adds 8, that is 8 − 20 = −12 Chaos in this simplified example. The second option does not pay for itself; the first still needs to justify its time, risk, and liquidity.
Estimate added rewards using comparable tests, include other consumables, observe difficulty and failures, and measure added duration. An expected average need not occur in any particular attempt. Set an acceptable maximum cost and revise it when prices or gameplay conditions change.
Juicing means intensifying maps with consumables, modifiers, and systems to raise difficulty and possible rewards. More Scarabs do not guarantee a higher net result. A simple or Scarab-free setup may be preferable when the extra reward fails to cover the full extra cost.
Liquidity: Turn Rewards into Verifiable Sales
Liquidity is how easily you can convert an item into tradable resources at your intended price and quantity. A commonly sought stackable material may sell quickly, while a specialized Rare may sit in your Stash until the right buyer appears. Not every stackable item has good liquidity, though. Examine demand, comparable listings, stock, exchange ratios, and effort needed to trade.
To check references on poe.ninja, select PoE 1, the correct league, Economy, and the resource category. Then compare equivalent offers on the official Trade Site. poe.ninja is a community tool, not a GGG service. Its suggested values are neither proof of a completed sale nor necessarily representative of rare variants or thinly traded markets.
Record evaluation date, league, and criteria. Don’t assign the lowest listing price of a vaguely similar item to your whole batch without examining modifiers, quantity, and actual availability. The unit price can differ from the ratio available for a large lot. Volume does not guarantee a premium: convenience may support demand, or the market may require a discount.
In Trade, selling systems serve different purposes:
- Currency Exchange: eligible stackable resources. Verify I Want, I Have, quantity, exchange rate, and Gold Fee before placing an order.
- Merchant’s Tabs: asynchronous trading of eligible items. A listing is not a completed sale.
- Premium Stash Tabs: traditional listings, depending on setup and the trading method used.
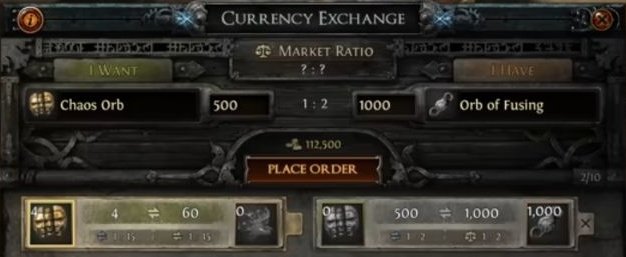
The historical demonstration shows I Want, I Have, and the Gold fee before Place Order. An offered ratio or prepared order does not prove receipt: count only what you actually received. Screenshot values are not current league quotes.
Gold and trade currency are distinct resources. Record the Gold required for an operation without adding it directly to Chaos as though they shared a unit. If you estimate Gold’s indirect value through the time needed to earn it, declare that method separately from currency paid.
To measure total efficiency, include identifying items, researching prices, listing, negotiating, and collecting proceeds. Asynchronous selling may reduce simultaneous interaction, but it doesn’t eliminate all management work. The trade, Faustus, and economy guide details these systems; here, the key is recording what was actually realized.
Variance, Exceptional Drops, and Failed Attempts
Results fluctuate. Some methods yield frequent rewards; others depend heavily on rare events. Variance describes this spread, but a small sample alone cannot establish the farm’s true distribution.
Consider five hypothetical gross results: 5, 6, 4, 5, and 80 Chaos. Total = 5 + 6 + 4 + 5 + 80 = 100; mean = 100 ÷ 5 = 20 Chaos. Sorted results are 4, 5, 5, 6, 80, giving a median of 5 Chaos. Four attempts were between 4 and 6, while one exceptional drop pushed up the mean.
Without the biggest drop, the total is 20 Chaos over four attempts, an average of 5. Show both views and the number of observations behind each. Don’t remove a legitimate jackpot from your overall total, but don’t promise a result near 20 on the next attempt simply because it skewed the average.
Record total, total without the largest drop, mean, median, number of attempts, and observed frequency of exceptional events. The five values above are gross; operating costs and time must still be deducted before discussing net results. One success in five attempts does not establish an official 20% drop rate.
Deaths and failures belong in the record too. If you prepare five maps, finish three, and lose two, count five attempts, three completions, two failures, all five costs, and the rewards actually received. Don’t charge costs only to successful attempts. Track repeat entries, consumed portals, and abandoned-attempt duration.
Lost experience may be a major downside when leveling is your goal, even when it cannot reasonably be converted into Chaos. In Hardcore, risk and consequences change further. Don’t invent a monetary charge for every death: record its relevant effect on the objective.
Repeated deaths don’t automatically mean you must abandon a strategy. You might lower difficulty, remove modifiers, simplify consumables, or upgrade the build. Compare the revised setup including failures. Hiding them to preserve a flattering result is the mistake.
Test and Compare Strategies Using the Same Method
Testing begins before your first portal. Initially, you may only want to check whether your build can finish the content; that is not the same as accurately estimating long-term expected returns.
- Choose the activity and goal. Record patch, league, build, and relevant conditions so the comparison can be repeated.
- Save the Atlas tree, location/tier or special entry conditions, and consumable combination. Verify current eligibility and limits.
- Define the batch, capital, operating costs, and valuation rule for self-found materials. Keep enough reserves to withstand a poor test.
- Run it while timing preparation, content, and sorting/selling separately. Count attempts, completions, deaths, and failures.
- Separate completed sales from unsold inventory. Identify extraordinary drops and record valuation date and method.
- Calculate net, results per attempt and hour, ROI where defined, and variance views. Compare results with the goal.
- If possible, change one meaningful variable at a time or repeat to assess consistency. Record what changed.
Changing your build, map, Scarabs, and tree simultaneously makes it hard to tell what caused a difference. Note market-price and liquidity changes between sessions too. A better result may reflect the market or a jackpot rather than a superior setup.
No universal sample size guarantees precision. An initial batch checks feasibility; subsequent batches reveal costs and time; larger samples may better reveal dispersion. Methods depending on extremely rare drops require extra caution. Ten maps alone do not substantiate a promised expected-profit figure.
To compare A and B, use one table with the same currency, dated observations, and cost/time definitions:
| Criterion | Strategy A | Strategy B |
|---|---|---|
| Starting capital and operating cost | Record separately | Same rule |
| Attempts, completions, and failures | Include all | Include all |
| Time per attempt and total time | Measure preparation/sales separately | Same time scope |
| Realized revenue and estimated inventory | Keep separate | Keep separate |
| Realized and potential net | Calculate both where relevant | Same formulas |
| Results per attempt and per hour | Specify numerator and denominator | Same definitions |
| Deaths, risk, and experience | Record impact | Record impact |
| Liquidity and variance | Evaluate sales and rare-drop dependence | Same view |
| Comfort and concentration required | Record the session experience | Record the session experience |
| Operational ROI, if defined | State result and cost used | Same calculation rule |
A may produce more per map while B earns more per hour because it is quicker. Lower risk and attention may matter as well. Don’t compare A’s gross revenue against B’s net result, or A’s execution-only hour against B’s total hour. Conclusions apply only to the measured conditions.
Organize Each Session and Keep a Usable Record
Before starting, prepare your batch: access, Map Items, Scarabs, modifiers, tree, filter, and Stash space. During execution, deposit rewards consistently and note important events. At the end, sort, value, sell when appropriate, and update your metrics. Grouping tasks reduces interruptions without erasing time spent outside maps.
Your Loot Filter should highlight items relevant to the strategy: Essences, Lifeforce, Scarabs, Fossils, fragments, Divination Cards, Uniques, and useful bases. A filter that’s too permissive increases irrelevant looting; one that’s too strict may hide your target items. On FilterBlade, confirm PoE 1 and the filter version before customizing it. A filter changes how loot is displayed; it does not increase drops.

A Dump Tab lets you deposit items quickly before detailed evaluation. Run content, deposit, prepare the next encounter, and review the tab after the batch. It cuts interruptions but shouldn’t become a permanent pile of unvalued, untracked items. Keep input consumables separate from rewards so you don’t attribute existing wealth to the current batch.
Use one row per session or batch in a spreadsheet or whatever record you prefer. The following table serves as a field dictionary; split grouped fields into multiple columns whenever you need extra detail. You don’t need a separate file to use this approach.
| Record Field | What to Enter |
|---|---|
| Strategy and goal | Method name and target resource or progression |
| Patch, league, and build | Game context, character, and relevant skill |
| Location and Atlas | Area/tier or special access, saved tree configuration |
| Map Items, Scarabs, other consumables | Types, amounts, preparation, fragments, special resources |
| Outlay and operating cost | Valuation method; consumed value separately from reusable gear |
| Attempts, completions, failures, deaths | Distinct counters, including lost attempts |
| Execution, preparation, and selling time | Separate values and overall hours |
| Realized revenue | Completed sales and stated treatment of direct currency drops |
| Estimated inventory | Only unsold stock, dated valuation and conversion rates |
| Realized net | Realized revenue minus included operating cost |
| Potential net | Realized revenue plus estimated inventory minus the same cost |
| Results per map/attempt and hour | Chosen result divided by corresponding attempts or hours |
| Observations | Exceptional drops, prices, setup changes, difficulty, comfort |
| Operational ROI, if applicable | Realized or potential net ÷ operating cost × 100%; label the method and never divide by zero |
Update the same row when inventory sells: replace its estimate with the actual proceeds and record the sale date and extra time. A revaluation without a sale changes estimated inventory only.
Adapt Your Decisions to Your Character and SSF
These four scenarios illustrate different choices without repeating the full tutorial:
| Situation | Decision to Test |
|---|---|
| Just finished the campaign, with little currency and an incomplete Atlas | Start with accessible, low-investment content; scale after confirming execution and costs |
| Clears packs fast but has moderate single-target damage | Compare pack-based farming with bossing, including time, access, and current build risk |
| Uses many Scarabs but loses maps to deaths | Include every failure and compare net/hour against a less intense setup |
| Finds an exceptionally valuable Unique | Show total, result without the Unique, observed occurrence, and whether its value is sold or merely estimated |
In Solo Self-Found, conventional player trading isn’t available. Don’t attribute a sale profit to inventory that the character cannot actually sell. Prefer useful materials per hour, bases found, fragments accumulated, experience, Atlas bonuses, and measurable upgrades.
If you need Essences for a weapon, content providing them may meet your goal better than a strategy with a higher theoretical Trade valuation. Trade prices can provide context but cannot replace direct utility or scarcity in SSF. Attempts, time, risk, and outcomes are still worth tracking; the final success metric must change.
Review 3.29 Mechanics and Count the Whole Allflame Process
Before copying an Atlas tree or consumable list, verify the patch, names, and effects. Changes don’t just affect the “best price”: they may alter the source of a resource or the entire encounter.
- Abyss: reworked encounters and adjusted Scarabs. Stygian Vises and Abyssal Jewels primarily come from Abyss as their conventional source; the announced exception is rare Jewels in Delve’s Abyss Biomes, not a general belt exception.
- Legion: Enshrouding Crystals are linked to Enshrouded Uniques; Crystals of Permutation in the Domain of Timeless Conflict transform these into different Uniques of the same class with a Vestigial implicit. Count the sources and conversion chain, not just the end product.
- Mercenaries: permanent content and new Trarthan Scarabs. Read individual effects and limits rather than relying on old configuration names.
- Ultimatum: the exclusive conventional source of Catalysts in 3.29, removed from previous sources such as Tujen. A historical Expedition strategy cannot keep that income in its calculations.
- Breach and Betrayal: changes to monsters/Unstable Breaches, passives, rewards, and Scarab sources alter what older routes provide. Reassess encounter duration, volume, and rewards.
Update 3.28 had already removed acquisition of old Harbinger Scarabs and their variants while redesigning the Atlas, Astrolabes, and Map Device. In 3.29, for example, the basic Abyss Scarab’s limit became five; that doesn’t mean every other Scarab can also be repeated five times. This guide does not present a specific combination as a farming recommendation. Consult the official 3.29 patch notes and current item text.
In the seasonal Curse of the Allflame league, Charts, Voyages, The Sovereign, underwater exploration, and Allflame Lanterns make up an acquisition sequence. Record the time needed to gather Charts, plan the Voyage, prepare and run the exploration, as well as consumed resources and intermediate rewards. Measuring only the final stage can hide all the work required to make it possible.

Ducats and Dead Man’s Sulphur contribute to crafting opportunities; Vesper offers Allflame Crafting with its own options and limitations. If you use these resources to make items for sale, count consumption, discarded outcomes, time, and actual revenue. The new system isn’t automatically profitable, and its seasonal nature doesn’t guarantee permanence after the league. The official Allflame presentation explains the exploration context.
Decide Whether to Continue, Adjust, or Switch
Continue when your build runs the activity consistently, costs and resupply are manageable, results meet the goal, and the method is still enjoyable. In Trade, also watch whether sales keep up with production; in SSF, whether the resources are still needed.
Adjust when you can identify a problem: expensive Scarabs, modifiers causing deaths, slow preparation, poor filtering, or a secondary mechanic consuming more time than the value it adds. Record a comparison rather than changing everything at once.
Switch when your goal changes, access becomes unworkable, risk and investment stop making sense, or another feasible activity better serves your character. A patch or loss of interest can also justify it. One poor session doesn’t condemn a strategy; endlessly repeating it without investigating failures doesn’t prove consistency either.
Before your next batch, verify:
- Your goal, PoE 1, patch, league, build, and access are defined.
- The Atlas, location, modifiers, Scarabs, and current limits have been checked.
- Costs, the rule for self-found materials, and reserves are recorded.
- Your filter and storage separate inputs from rewards.
- All attempts, deaths, failures, and time are counted.
- Sales and estimated inventory are separate, with no double counting and dated conversions.
- Net, result per attempt/hour, and ROI use clearly stated rules.
- Liquidity, exceptional drops, comfort, and risk inform your decision.
This article concludes the 22 foundational guides #054–#075 of ZAUS.GG Phase 2 and establishes the methodology for the planned 60 individual guides #076–#135. Each activity will cover its goal, requirements, build, access/Atlas, consumables, low-investment alternative, execution, costs, rewards, liquidity, risk, SSF adaptation, test, and stopping criterion. Links will be added as guides are published; you don’t need to choose all strategies right now.
The right farm is the one you can run, measure, and adapt to your goal. Distinguish received value from estimates, count the entire workload, and use your records to make the next decision. An advertised high hourly figure is useful only when you understand the conditions that produced it.
Editorial check, October 28, 2026: 3.28 patch notes, 3.29 patch notes, 3.29.3b patch notes, and official patch index. All calculations are educational, with no measured farming results or live market quotes. Images: official GGG promotional material from Mirage and Allflame, with historical context identified. Currency Exchange: official GGG video from 2024, with historical values.
FilterBlade: ZAUS.GG’s own screenshot of the FilterBlade / NeverSink interface, with GGG game elements. Third-party materials are not presumed openly licensed.
About the Author